Firefox OS “Hello World”
After meeting the Firefox OS guys at the MWC in Barcelona, I decided to give a go to porting my first app from PhoneGap (BlackBerry) to FireFox OS. The app I chose, was a simple HTML based app, with no requirement for access to device sensors etc. It used Jquery Mobile, but not much else.
First up, is that you have to put a file called manifest.webapp into the root (/www) folder of the app, with someting like the following content:
{
“name”: “Free SMS”,
“description”: “A firefox OS app that allows you send free SMS text messages from your firefox smartphone to most European countries”,
“launch_path”: “/index.html”,
“icons”: {
“128”: “/resources/icon128.png”
},
“developer”: {
“name”: “Open Merchant Account Ltd”,
“url”: “http://www.openmerchantaccount.com ”
},
“default_locale”: “en”
}
Of course, the files index.html and /resources/icon128.png need to exist, and icon128 needs to be 128×128 pixels in size. Zip the folder up, ensuring that manifest.webapp and index.html are at root level of the zip file.
Create an account at firefox marketplace, and go to https://marketplace.firefox.com/developers/submit/app/manifest – I selected packaged app, although the website recommends a that you choose hosted. Press select a file, and upload the zip. If everything works ok, then you should be able to move to the next page where you should supply screenshots, and marketing text.
In order to create screenshots, then you’ll need the latest version of firefox, then download firefox_os_simulator xpi at https://marketplace.firefox.com/developers/docs/firefox_os_simulator – This plugin can then be installed by pressing Tools > Add ons > Gear icon > Install add on from file. Once the add on is installed, press “Add Directory” and select the manifest.webapp from your hard drive.
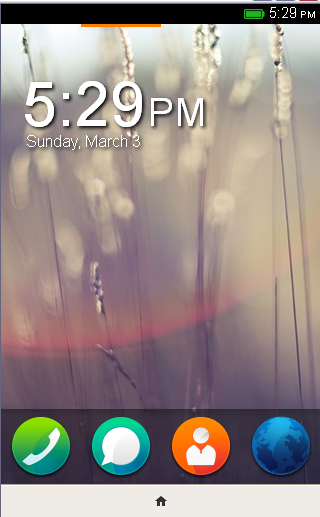
The simulator should kick into life, and if you unlock it, then swipe the apps right a few pages, you should see your app. Click to launch, and snap a few screenshots.
Currently Firefox OS marketplace appears to be available only for US, UK, Brazil and Spain, but it should increase in time.
My completed zip can be downloaded from my RPI server here http://www.servedwithpi.com/firefoxos.zip
Get a profile ID from Facebook URL in C#
If you want to convert a Facebook URL like http://www.facebook.com/LambOfficial into a profile id, “56062886901”, so that you can link to the page using the FB:// protocol, i.e. FB://profile/56062886901 – which looks better than a web link on iOS. Then the simple trick is to replace the “www” with “graph”, and then look for the id parameter.
To do this from code, then you would use something like this:
const string strFBRegex = @”id.:..(?<id>\d+).,”;
var strGraphUrl = strUrl.Replace(“www”, “graph”);
var wc = new System.Net.WebClient();
var strGraphJson = wc.DownloadString(strGraphUrl);
strId = System.Text.RegularExpressions.Regex.Match(strGraphJson, strFBRegex).Groups[“id”].Value;
Where strUrl is the input url, and strID is the output.
However, this does not account for facebook pages that have the format http://www.facebook.com/pages/pagename/id, in which the profile id is visible in the url, but the graph page does not work.
So, something like this catches this case also:
var strId = “”;
if (!strUrl.ToLower().Contains(“/pages/”))
{
const string strFBRegex = @”id.:..(?<id>\d+).,”;
var strGraphUrl = strUrl.Replace(“www”, “graph”);
var wc = new System.Net.WebClient();
var strGraphJson = wc.DownloadString(strGraphUrl);
strId = System.Text.RegularExpressions.Regex.Match(strGraphJson, strFBRegex).Groups[“id”].Value;
}
else
{
strId = System.Text.RegularExpressions.Regex.Match(strUrl, @”\d+”).Value;
}
strFBUrl = “fb://profile/” + strId;
Installing a HTTP Proxy on Debian 4 (ETCH)
I’m very much a Linux newbie, however, I just managed to install a HTTP proxy on my Linux box, with a view to install it on my Raspberry pi. Which will provide me with a proxy server with a dynamic IP address.
The abridged version is quite simple:
1. Run apt-get update
2. Run apt-get install tinyproxy
3. Edit /etc/tinyproxy/tinyproxyy.conf and add a “#” before the Allow lines to make the proxy public
4. Run /etc/init.d/tinyproxy restart to apply the configuration changes.
I initially thought there was a problem when I went to the proxy url directly
Cache Error!
The following error has occured: Unknown URL type
Generated by tinyproxy (1.6.3)
But this is perfectly normal, you’re not supposed to request it directly.
Use Google Docs as a basic CMS
If you want to provide a really quick CMS back end to a website or app, then you can use Google Doc’s spreadsheet CSV export, and a CSV-to-JSON proxy.
If you just create a spreadsheet in Google Docs, then press “Publish the web”, get the link and note the “KEY” parameter – then you can use the key in the following url:
http://dananos.brinkster.net/gdoc2json.php?KEY=0AtUK1jTDzCmodEtEYUE4alVjdUVvdFVHcWZlTlNub1E
where “KEY” is taken from the Google Doc.
You can then call this URL from your app.
Take a picture and upload it using Webworks on Playbook
When I tried to port a BlackBerry Phonegap project (v 2.0.4) to Playbook (QNX), I noticed that the camera did not return data as Base64 data, rather a FILE_URI, despite the Camera destination type being set to DATA_URL – So going back to first principles, I tried to re-implement the camera capture using BlackBerry WebWorks only.
After 14 tests and failures, this is the final version that worked:
<!DOCTYPE html PUBLIC “-//W3C//DTD HTML 4.01 Transitional//EN” >
<html>
<head>
<meta http-equiv=”Content-Type” content=”text/html; charset=UTF-8″>
<meta name=”viewport” id=”viewport” content=”height=device-height,width=device-width,user-scalable=no” />
<script src=”jquery.js”></script>
<script language=”javascript” type=”text/JavaScript” >
function takePicture()
{
blackberry.media.camera.takePicture(successCB, closedCB, errorCB);
}function successCB(filePath)
{
var can = document.getElementById(‘canvas’);
var ctx = can.getContext(‘2d’);
var img = new Image();
img.onload = function(){
can.width = img.width/10;
can.height = img.height/10;
ctx.drawImage(img, 0, 0, img.width/10, img.height/10);
var b64Text = can.toDataURL();
b64Text = b64Text.replace(“data:image/png;base64,”,””);
upload(b64Text)
}
img.src = filePath;
}
function upload(imageURI)
{
try
{
$.ajax({
type: “POST”,
url: “http://xxx.yourwebsite.com/upload.aspx”,
data: { image: imageURI}
}).done(function( msg ) {
alert(msg);
}).fail(function(a,b){
alert( “Failed to save:” + b);
});
}
catch(ex)
{
alert(ex);
}
}
function closedCB() {}
function errorCB(e) {}
</script>
</head>
<body >
<p>(V14) Test the Camera by pressing the button below</p>
<b><a href=”#” onclick=”takePicture();”>Take a Picture</a></b><br>
<canvas id=”canvas”></canvas>
</body>
</html>
Again, I’ve omitted the URL of the uploading script, but the source code for this can be found earlier in this blog.
I did notice that Webworks’ BlobToString BASE64 didn’t seem to work, so I instead, drew the image onto a canvas, (resized to a 10th of the normal size, since the PlayBook’s photos are massive). And called toDataURL on the canvas to get the Base64 image, then stripped off the data:image/png;base64,
Now, to replace the non-working Phonegap code with this working code…
Invalid config.xml – the value of id attribute is not valid
I decided eventually to upgrade from Phonegap-0.9.4 to Phonegap 2.4.0 for my BlackBerry development work after having trouble getting the camera to work, the old phonegap was ignoring my targetWidth / targetHeight parameters, couldn’t close the camera (key injection), and failed to save any image over 1.5 Meg.
Anyway, the new phonegap got round most of the problems with the camera, but when it came to packaging for the Playbook, I hit this error “Invalid config.xml – the value of id attribute is not valid”
load-device:
[exec] [INFO] Parsing command line options
[exec] [INFO] Parsing bbwp.properties
[exec] [INFO] Validating WebWorks archive
[exec] [INFO] Parsing config.xml
[exec] [ERROR] Invalid config.xml – the value of id attribute is not valid
The issue was simple to fix, but didn’t seem to be explained online, so here’s the solution:
<widget xmlns=”http://www.w3.org/ns/widgets”
xmlns:rim=”http://www.blackberry.com/ns/widgets”
version=”1.0.0.0″ id=”org.apache.cordova.example”>
Just Remove the id attribute from the <widget> tag, and it works!
Remove
Debugging live device on Blackberry

com.phonegap.camera
A Bit of an “easter egg” when it comes to debugging BlackBerry phones, is the key combination ALT + lglg, which, if you type in on the home screen of a blackberry phone shows the system error log. If you clear this, then run your app, errors and alerts will be written here.
When trying to port an iPhone Phonegap app to BlackBerry Webworks, the camera wasn’t working right. I could see it opening the camera, but it didn’t close the camera app automatically, and no data seemed to be uploaded.
I used this code example straight from the demo code:
navigator.camera.getPicture(onCaptureSuccess, onCaptureFail,
{ destinationType: Camera.DestinationType.DATA_URL, quality: 50 });
But it appears that at Quality 50, the image data is still too big – I’m going to try reducing this, and I’ll update this post if it works.
*Update*
Using the camera on Phonegap 0.9.4 is a non-starter. There is a size limit of 1.5 MB per photo, and the quality parameter, along with targetWidth and targetHeight are ignored. Also, the native camera app will not close unless you ask the user to manually turn on key injection. (Options > Application Management > Select App > Edit Permissions > Interactions > Input Simulation > Allow).
Simple solution was to upgrade to Phongap 2.4.0 and then set the targetWidth and targetHeight to something more manageable.
Get External IP address in Python
Getting your External IP address requires a remote server to reply with your client ip. I used a one-liner PHP script with simply <?php echo $_SERVER[‘REMOTE_ADDR’]; ?> hosted at dananos.brinkster.net/ip.php
Then I used the following python script to request the IP from this URL, and then save the output to file.
import httplib
conn = httplib.HTTPConnection(“dananos.brinkster.net”)
conn.request(“GET”, “/ip.php”)
r1 = conn.getresponse()
data1 = r1.read()
f = open(‘tempfile.txt’, ‘w’)
f.write(data1)
f.close()
Bit of trial-and-error, but it works.

Upload a photo from iPhone camera with PhoneGap
Getting a photo from an iPhone camera to the internet is the first step in any photo-sharing app. Here is a snippet of code using PhoneGap that uploads a photo from an iPhone to a webserver.
function onBodyLoad()
{
document.addEventListener(“deviceready”,onDeviceReady,false);
}
function onDeviceReady()
{
try{
navigator.camera.getPicture(onCaptureSuccess, onCaptureFail);
}
catch(ex)
{
alert(ex);
}
}
function onCaptureSuccess(imageURI)
{
try
{
$.ajax({
type: “POST”,
url: “http://distance.freetextuk.com/upload.aspx”,
data: { image: imageURI}
}).done(function( msg ) {
$(“#imgLoad”).attr(“src”,”http://yourserver.com/uploads/” + msg);
}).fail(function(a,b){
alert( “Failed to save:” + b);
});
}
catch(ex)
{
alert(ex);
}
}
function onCaptureFail()
{
alert(“Failed to capture!”);
}
protected void Page_Load(object sender, EventArgs e)
{
string strImage = Request.Form[“Image”];
if (string.IsNullOrEmpty(strImage))
{
Response.Write(“Image field not provided”);
return;
}
byte[] b = System.Convert.FromBase64String(strImage);
var strRealPath = Server.MapPath(“~/uploads/”);
var strRandomFile = System.IO.Path.GetRandomFileName() + “.jpg”;
FileStream fs = new FileStream(strRealPath + strRandomFile, FileMode.CreateNew);
fs.Write(b, 0, b.Length);
fs.Close();
Response.Write(strRandomFile);
}
Note, that you will need to create an “uploads” folder, and give this folder write permissions.
