Archive
#Nigerian Car Registration #API

Nigeria, home to 186 million people, and 10 million cars is the newest country to be added to our growing coverage of car registration APIs, and it’s accessible via http://ng.carregistrationapi.com/
It’s our third country in the Middle East / Africa continent to be added to our network, after UAE and South Africa, and we hope to add more in the coming months.
Prices start at 7 Naira per lookup, 0.02 USD – but we’re happy to offer introductory free credits for new companies for the next few months.
#AvatarAPI is now on #NPM for #NodeJS users

Let’s face it, not all your users bother with uploading a photo of themselves on your website, but it looks bland and boring when you just assign everyone with a placeholder image. AvatarAPI allows you get the real name and profile picture of your users from their email address. Great for giving that splash of colour and friendliness to your website.
We’ve just created an NPM package for the Avatar API so that NodeJS users can easily import the functionality into their apps.
Installation
Usage
We’re now on #NPM; making it easy to use our #APIs from #NodeJS

And here’s our first set of 20 Packages…
- car-registration-api-france – v1.0.6 – Get car information from a French number plate. An account username is required, which you can get from http://www.vehicleregistrationapi.com
- car-registration-api-sweden – v1.0.5 – Get car information from a Swedish number plate. An account username is required, which you can get from http://www.vehicleregistrationapi.com
- car-registration-api-spain – v1.0.5 – Get car information from a Spanish number plate. An account username is required, which you can get from http://www.vehicleregistrationapi.com
- car-registration-api-slovakia – v1.0.5 – Get car information from a Slovakian number plate. An account username is required, which you can get from http://www.vehicleregistrationapi.com
- car-registration-api-italy – v1.0.5 – Get car information from an Italian number plate. An account username is required, which you can get from http://www.vehicleregistrationapi.com
- car-registration-api-russia – v1.0.5 – Get car information from a Russian number plate. An account username is required, which you can get from http://www.vehicleregistrationapi.com
- car-registration-api-norway – v1.0.5 – Get car information from a Norwegian number plate. An account username is required, which you can get from http://www.vehicleregistrationapi.com
- car-registration-api-portugal – v1.0.5 – Get car information from a Portuguese number plate. An account username is required, which you can get from http://www.vehicleregistrationapi.com
- car-registration-api-pakistan – v1.0.6 – Get car information from a Pakistani number plate. An account username is required, which you can get from http://www.vehicleregistrationapi.com
- car-registration-api-uk – v1.0.4 – Get car information from a UK number plate. An account username is required, which you can get from RegCheck.org.uk
- car-registration-api-czechrepublic – v1.0.4 – Get car information from a Czech number plate. An account username is required, which you can get from http://www.vehicleregistrationapi.com
- car-registration-api-newzealand – v1.0.5 – Get car information from a New Zealand number plate. An account username is required, which you can get from http://www.vehicleregistrationapi.com
- car-registration-api-uae – v1.0.5 – Get car information from a United Arab Emirates number plate. An account username is required, which you can get from http://www.vehicleregistrationapi.com
- car-registration-api-finland – v1.0.4 – Get car information from a Finnish number plate. An account username is required, which you can get from http://www.vehicleregistrationapi.com
- car-registration-api-southafrica – v1.0.5 – Get car information from a South African number plate. An account username is required, which you can get from http://www.vehicleregistrationapi.com
- car-registration-api-netherlands – v1.0.5 – Get car information from a Dutch number plate. An account username is required, which you can get from http://www.vehicleregistrationapi.com
- car-registration-api-estonia – v1.0.4 – Get car information from an Estonian number plate. An account username is required, which you can get from http://www.vehicleregistrationapi.com
- car-registration-api-india – v1.0.5 – Get car information from a Indian number plate. An account username is required, which you can get from http://www.vehicleregistrationapi.com
- car-registration-api-ireland – v1.0.5 – Get car information from an Irish number plate. An account username is required, which you can get from http://www.vehicleregistrationapi.com
- car-registration-api-srilanka – v1.0.5 – Get car information from a Sri Lankan number plate. An account username is required, which you can get from http://www.vehicleregistrationapi.com
- car-registration-api-croatia – v1.0.5 – Get car information from a Croatian number plate. An account username is required, which you can get from http://www.provjeraregistracije.com
- car-registration-api-denmark – v1.0.5 – Get car information from a Danish plate. An account username is required, which you can get from http://www.vehicleregistrationapi.com
- car-registration-api-usa – v1.0.5 – Get car information from an American number plate. An account username is required, which you can get from http://www.vehicleregistrationapi.com
- car-registration-api-australia – v1.0.5 – Get car information from an Australian number plate. An account username is required, which you can get from http://www.carregistrationapi.com
Get a country code from an address in c#

If you have a partial address, or just a town / city name and you’d like to get the country code (ISO3166) then you can use Google’s geocode API from c# as follows;
The Google API key is not strictly necessary, but it’s recommended, as they will probably throttle use for unauthenticated calls.
public static string GetCountryFromAddress(string address)
{try
{
// API key is recommended, but not required
const string strGoogleApiKey = “….”;
var strUrl = “https://maps.googleapis.com/maps/api/geocode/json?address={0}&key={1}”;
strUrl = string.Format(strUrl, address, strGoogleApiKey);
var wc = new WebClient();
var strJson = wc.DownloadString(strUrl);
var json = JObject.Parse(strJson);
var jResult = json[“results”][0];
var jAddressComponents = jResult[“address_components”];
foreach (var jAddressComponent in jAddressComponents)
{
var jTypes = jAddressComponent[“types”];
if (jTypes.Any(t => t.ToString() == “country”))
{
return jAddressComponent[“short_name”].ToString();
}
}
return null;
}
catch
{
return null;
}
}
#Headless CMS using C#, #NodeJS or #Java
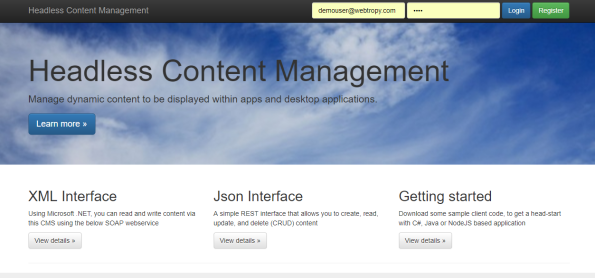
Headless Content Management – (https://www.headlesscontentmanagement.com/) is a service that decouples the work typically done by content writers and developers. It is designed for use in situations where the content is not going to be viewed on a web-page, but instead is going to be displayed within a mobile app or desktop application.
There are many CMS systems out there, and most of them have APIs. Your content team are probably familiar with the likes of WordPress, Joomla and Dotnetnuke – but most operate on the premise that the content is going to be viewed on a web page via a web browser. Headless Content Management makes no such assumption, and won’t help you display your content online – it just exposes the content via a set of APIs, XML and JSON based.
Headless CMS can also be used in situations where you have an existing website that isn’t based on a CMS platform like WordPress / Joomla etc. So if you have a in-house developed bespoke website, and need to make it easy for content writers to add and edit content on your website. You can use Headless Content Management to manage your content, then have your existing website call our APIs, in order to retrieve the content to be displayed.
The interface with HeadlessContentManagement.com can be done via many different languages, here are three popular examples – C#, NodeJS and Java
C#
// You need to make a service reference to https://HeadlessContentManagement.com/api.asmx
var api = new api.APISoapClient();// Replace the username and password with those defined on HeadlessContentManagement.com
var strUsername = “demouser@webtropy.com”;
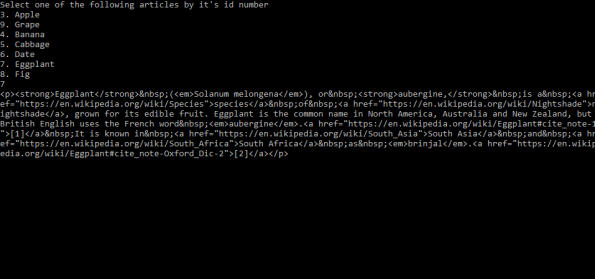
var strPassword = “demo”;Console.WriteLine(“Select one of the following articles by it’s id number”);
var articles = api.ListArticles(strUsername, strPassword);
foreach(var article in articles)
{
Console.WriteLine(string.Format(“{0}. {1}”, article.id, article.subject));
}
// Ask the user to enter a number
var strId = Console.ReadLine();
var intArticleId = Convert.ToInt32(strId);// Get that one Article
var selectedArticle = api.ReadArticle(strUsername, strPassword, intArticleId);
Console.WriteLine(selectedArticle.body);
Console.ReadLine();
NodeJS
var request = require(‘request’); // run npm install request
var email = ‘demouser@webtropy.com’;
var password = ‘demo’;
request.post(
‘https://www.headlesscontentmanagement.com/ajax/ListArticles.aspx’,
{form:{email:email,password:password}},
function (error, response, body) {
if (!error && response.statusCode == 200) {
showArticleSummary(JSON.parse(body));
}
else
{
console.log(response.statusCode);
console.log(body);
}
}
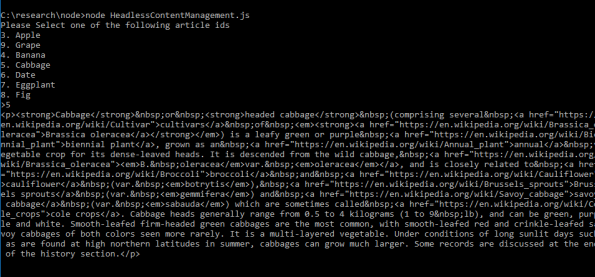
);function showArticleSummary(Articles)
{
console.log(“Please Select one of the following article ids”);
for(var i in Articles)
{
var Article = Articles[i];
console.log(Article.id + “. ” + Article.subject);
}
process.stdout.write(“>”)
var stdin = process.openStdin();stdin.addListener(“data”, function(d) {
var strArticleId = d.toString().trim();
var intArticleId = parseInt(strArticleId);
process.stdin.pause();
ReadArticle(intArticleId);
});
}function ReadArticle(intArticleId)
{
request.post(
‘https://www.headlesscontentmanagement.com/ajax/ReadArticle.aspx’,
{form:{email:email,password:password, id:intArticleId}},
function (error, response, body) {
if (!error && response.statusCode == 200) {
console.log(JSON.parse(body).body);
}
else
{
console.log(response.statusCode);
console.log(body);
}
}
);
}
Java
import java.net.HttpURLConnection;
import java.net.URL;
import java.net.MalformedURLException;
import java.io.IOException;
import java.io.*;
import org.json.JSONException; // requires org.json package from https://mvnrepository.com/artifact/org.json/json/20170516
import org.json.JSONObject;
import org.json.JSONArray;public class HeadlessContentManagement {
public static void main(String[] args) {
String strJson = getJson(“https://www.headlesscontentmanagement.com/ajax/ListArticles.aspx”, “email=demouser@webtropy.com&password=demo”);
System.out.println(“Got Response”);
JSONArray array = new JSONArray(strJson);
for(int i = 0 ; i < array.length() ; i++){
JSONObject article = array.getJSONObject(i);
System.out.println(article.getInt(“id”) + “. ” + article.getString(“subject”));
}
}
public static String getJson(String serverUrl,String param){
StringBuilder sb = new StringBuilder();
String http = serverUrl;
HttpURLConnection urlConnection = null;
try {
URL url = new URL(http);
urlConnection = (HttpURLConnection) url.openConnection();
urlConnection.setDoOutput(true);
urlConnection.setRequestMethod(“POST”);
urlConnection.setUseCaches(false);
urlConnection.setConnectTimeout(50000);
urlConnection.setReadTimeout(50000);
urlConnection.connect();
OutputStreamWriter out = new OutputStreamWriter(urlConnection.getOutputStream());
out.write(param);
out.close();
int HttpResult = urlConnection.getResponseCode();
if (HttpResult == HttpURLConnection.HTTP_OK) {
BufferedReader br = new BufferedReader(new InputStreamReader(
urlConnection.getInputStream(), “utf-8”));
String line = null;
while ((line = br.readLine()) != null) {
sb.append(line + “\n”);
}
br.close();
return sb.toString();
} else {
System.out.println( urlConnection.getResponseMessage());
}
} catch (MalformedURLException e) {
e.printStackTrace();
} catch (IOException e) {
e.printStackTrace();
} finally {
if (urlConnection != null)
urlConnection.disconnect();
}
return null;
}
}
You’re linking to your #socialmedia wrong! @urlgenius

Most people when using a mobile device, when they click on your instagram, facebook or twitter link, they would prefer to see that page in the respective app rather than the website version of that page.
UrlGenius is a tool that detects the user agent of the visitor, be it Android, iOS, or desktop, and redirects the user to the correct app (- if mobile), or the webpage, if desktop.
For example https://urlgeni.us/instagram/codgf will redirect to
instagram://user?username=cityofderryguitarfestival
(on iOS)
or
(on Android)
Plus it gives you all the visitor stats you need, like a bit.ly link.
Select and #Upload a file to #AWS S3 using #WinJS

So, this is how to select a file from your phone, and upload it to Amazon S3, using the cordova plugin cordova-plugin-windows-filepicker and some ASP.NET code on the server.
Here’s the WinJS (Javascript code)
window.plugins.WindowsFilePicker.open(function(uri) {
debugger;
var url = new Windows.Foundation.Uri(uri);
Windows.Storage.StorageFile.getFileFromApplicationUriAsync(url).then(function(file) {
debugger;
Windows.Storage.FileIO.readBufferAsync(file).done(function(buffer) {
debugger;
var bytes = new Uint8Array(buffer.length);
var dataReader = Windows.Storage.Streams.DataReader.fromBuffer(buffer);
dataReader.readBytes(bytes);
dataReader.close();
var base64 = btoa(String.fromCharCode.apply(null, bytes));
$http({
method: ‘POST’,
url: “http://www.yourserver.com/s3upload.aspx”,
headers: {
‘Content-Type’: ‘application/x-www-form-urlencoded’
},
transformRequest: function(obj) {
var str = [];
for (var p in obj)
str.push(encodeURIComponent(p) + “=” + encodeURIComponent(obj[p]));
return str.join(“&”);
},
data: {
“data”: base64,
“extension”: file.fileType.substring(1)
}
}).then(function(response) {
$scope.file = response.data;
}, function(error) {
debugger;
});
});
}, function(error) {
debugger;
});
}, function(error) {
debugger;
});
This code is using AngularJS, but you can modify the AJAX part to use XHR or JQuery, as you need. – when complete it sets $scope.file to a URL hosted on Amazon AWS S3.
And here’s the code for the server-side:
var strBase64 = Request.Form[“data”];
var strExtension = Request.Form[“extension”];
var bBase64 = Convert.FromBase64String(strBase64);
var strUrl = S3.Upload(bBase64, strExtension);
Response.Write(strUrl);
Where the S3 class is as follows (username / password removed)
public static string Upload(byte[] data, string extension)
{
var ms = new MemoryStream(data);
var filename = Guid.NewGuid().ToString(“D”) + extension;
var cfg = new AmazonS3Config { RegionEndpoint = Amazon.RegionEndpoint.EUWest1 };
const string bucketName = “faxoff”;
var s3Client = new AmazonS3Client(“xxxxxx”, “yyyyy”, cfg);
var fileTransferUtility = new TransferUtility(s3Client);
var fileTransferUtilityRequest = new TransferUtilityUploadRequest
{
BucketName = bucketName,
InputStream = ms,
StorageClass = S3StorageClass.ReducedRedundancy,
Key = filename,
CannedACL = S3CannedACL.PublicRead
};
fileTransferUtility.Upload(fileTransferUtilityRequest);
return “https://s3-eu-west-1.amazonaws.com/xxxxx/” + filename;
}
Using #Fortumo payments from within a #Cordova App @Fortumo

Fortumo offers a payment service based on premium SMS and direct carrier billing, it’s ideal for collecting micro-payments from customers who don’t have a credit card. It’s ideal for Android / Windows Phone apps.
They have great SDKs for native Android / Windows Phone, but if you’re developing a hybrid app, like based on Cordova, then you can use their WebSDK, and this is how I integrated it using the InAppBrowser
var webbrowser = window.open(“https://pay.fortumo.com/mobile_payments/dafc782dbdb9fd193b970f359af045a8“, “_blank”);
webbrowser.addEventListener(‘loadstart’, function (event) {
if (event.url == “https://infiniteloop.ie/“)
{
debugger;
}
});
Now, the long GUID marked in bold, and the return url will be different for your application – you’ll get this from Fortumo.
Modal popup replacement for ion-select #ionicFramework

Download: https://1drv.ms/u/s!AlkUa-u6o9yJl2Mnv399EnAz4NA8
If you want to extend the functionality of ion-select, and would like to display it as a modal popup, then you can use this code above.
You define the data in $rootScope, and you can edit the template in myPopupBox to determine the properties etc.
This code was written by someone else, it wasn’t me – not claiming credit / responsiblity for it 🙂
#NoSQL Implement persistent key/value storage in #JavaScript

nosql.apixml.net
Implement persistent Key/Value storage using client side java script only
Installation
http://nosql.apixml.net/nosql.js
Save data
    var id = nosql.guid();
    nosql.put(id,"hello world").then(function (data) {
           // This stores "Hello world"
    });
Load data
    nosql.get(id).then(function(data){
            alert(data);
    });
Each key in the store must be a GUID (i.e. 9ED4B528-7F5F-3074-BBBF-947C6133ED13), this is to prevent overlaps between your keys and other user’s keys. Data can be any string, typically this would be json, but you can store any UTF8 string (not binary data).
This is backed by a REST API, which you make a GET, POST, or DELETE request to http://nosql.apixml.net/%5BGUID%5D to retrieve, update/insert and delete data respectively.
