Archive
#Nuget #Package for #WordPress.com #API

If you want to automate processes based on the WordPress API – especially in situations where you want to do so without user interaction (i.e. server side / unattended / without oAuth), and you know C# / .NET, then this nuget package is for you.
First, you install the package via Nuget package manager;
Install-Package WordPressAPI
Then, in order to authenticate yourself against WordPress, You will need a wordpress username, password, and blog ID. Get your Blog ID by going to https://developer.wordpress.com/docs/api/console/ then Login and search /me/sites or /sites/hello.wordpress.com
And here is a simple code example
var strAccessToken = WordPressComAPI.Wordpress.Login(new WordPressComAPI.Wordpress.Credentials
{
	Username = xxxxxx,
	Password = xxxxxx,
	blogId = xxxxx
});
var strSite = https://public-api.wordpress.com/rest/v1.1/sites/blog.dotnetframework.org;
var jSite = WordPressComAPI.Wordpress.Get(strSite,strAccessToken);
Making a #HTTP request via #TCP/IP in C#

Sometimes using WebClient or HttpClient hides important information on how you connect to a remote server. Recently I was getting a protocol violation error, when making a web request to a server. OK, so the remote server was misbehaving and sending me back corrupted HTTP headers, but I still wanted to see the response, but WebClient / HTTPRestponse was not showing me anything, just throwing an exception.
So, I resorted to TCPClient – Once again, I have to stress, this should be a last resort, you should never need to make HTTP requests using raw TCP/IP, anyway.
So, what I was trying to do, is get my remote IP address while going through a proxy, which should be the IP address of the proxy, as long as it is working correctly, and here’s the code;
private static void tcpconnect()
{
var tcp=new TcpClient(“**proxy IP***”,*** Proxy port ***);
var stream = tcp.GetStream();
var send = Encoding.ASCII.GetBytes(“GET http://www.icanhazip.com HTTP/1.0\r\n\r\n”);
stream.Write(send,0,send.Length);
var sr = new StreamReader(stream);
var str = sr.ReadToEnd();
Console.WriteLine(str);
tcp.Close();
stream.Close();
}
The Http 1.0 requires the server to close the TCP connection after the response is sent. HTTP 1.1 would keep the TCP connection open, so the ReadToEnd would hang. You could send Connection:close and use HTTP 1.1 if you wanted, or use a more intelligent stream reader.
If you’d like to know more about this subject, You can do worse than check out my book which is available here: Buy at Amazon US or Buy at Amazon UK
Remote control app for #PopcornTime app available on #iOS
Check out this video showing the Popcorn time remote control app pairing via QR code with Popcorn Time.
You can download the app from iTunes here;
https://itunes.apple.com/us/app/popcorn-remote/id1290119967?ls=1&mt=8&at=1000l9tW
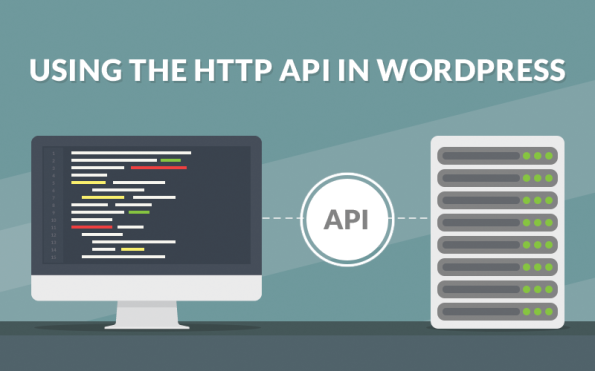
Using the #HTTP #API in #WordPress with C#
This is NOT how you are supposed to use the WordPress API. this is a very specific use case, and unless you’ve exhausted everything else, you’re probably in the wrong place. But caveat’s aside here’s what I was trying to achieve.
I wanted to automatically search for wordpress sites with a particular search term, and auto like the posts. It’s a technique that works well on twitter, so I wanted to try the same on WordPress.
Now, this application is to run unattended, so I don’t want the OAuth prompt to appear, I just want it to log in as me. My credentials are removed from the code examples below.
First off, create a wordpress app, and get your client id and secret. The redirect url does not matter, you won’t use it. but a valid url is required. You will also need to get your blog id, you can get this from the developer console.
Here’s the login code in C#
private static string Login()
{
var http = new HTTPRequest();var strUrl = “https://public-api.wordpress.com/oauth2/authorize?”;
strUrl += “client_id=*****”;
strUrl += “&redirect_uri=******”;
strUrl += “&response_type=code”;
strUrl += “&blog=*******”;var strLoginPage = http.Request(strUrl);
var strUrl2 = “https://wordpress.com/wp-login.php?action=login-endpoint”;
var strPostdata = “username=*********”;
strPostdata += “&password=**********”;
strPostdata += “&remember_me=false”;
strPostdata += “&redirect_to=”;strPostdata += HttpUtility.UrlEncode(“https://public-api.wordpress.com/oauth2/authorize?” +
“client_id=********” +
“&redirect_uri=http://*********” +
“&response_type=code” +
“&blog=*********”);strPostdata += “&client_id=39911”;
strPostdata += “&client_secret=cOaYKdrkgXz8xY7aysv4fU6wL6sK5J8a6ojReEIAPwggsznj4Cb6mW0nffTxtYT8”;var strResponse = http.Request(strUrl2, “POST”, strPostdata);
var strNextUrl = “https://public-api.wordpress.com/oauth2/authorize?”;
strNextUrl += “client_id=*********”;
strNextUrl += “&redirect_uri=http://*************”;
strNextUrl += “&response_type=code”;
strNextUrl += “&blog=*********”;var strResponse2 = http.Request(strNextUrl);
var strNonceRegex = @”nonce..value..(?<Nonce>[\w]+)”;
var strNonce = Regex.Match(strResponse2, strNonceRegex).Groups[“Nonce”].Value;var strNextUrl2 = “https://public-api.wordpress.com/oauth2/login/?”;
strNextUrl2 += “client_id=*********”;
strNextUrl2 += “&redirect_uri=http%3A%2F%2F**********”;
strNextUrl2 += “&response_type=code”;
strNextUrl2 += “&action=oauth2-login”;
strNextUrl2 += “&redirect_to=https%3A%2F%2Fpublic-api.wordpress.com%2Foauth2%2Fauthorize%2F%3Fclient_id%3D*********%26redirect_uri%3Dhttp%253A%252F%252F********%26response_type%3Dcode%26jetpack-code%26jetpack-user-id%3D0%26action%3Doauth2-login”;
strNextUrl2 += “&blog_id=***********”;
strNextUrl2 += “&_wpnonce=” + strNonce;var strResponse3 = http.Request(strNextUrl2);
var qs = HttpUtility.ParseQueryString(http.PageUri.Query);
var strCode = qs[“Code”];
var strExchangeUrl = “https://public-api.wordpress.com/oauth2/token”;
strPostdata = “client_id=******”;
strPostdata += “&redirect_uri=http://*******”;
strPostdata += “&client_secret=KgNwl6lETO227GEarjZWFDtiCRihpIU8gMqBky4P5srG0Z4p9WnUFCmR3XidUin5”;
strPostdata += “&code=” + strCode;
strPostdata += “&grant_type=authorization_code”;var strAuthTokenData = http.Request(strExchangeUrl,”POST”, strPostdata);
var json = JObject.Parse(strAuthTokenData);
var strAccessToken = json[“access_token”].ToString();
return strAccessToken;
}
Once you have the access_token then you can make requests to the WordPress API, by setting Authorization: Bearer + strAccessToken in the HTTP headers.
There was no API for searching all WordPress sites, but I used their search page as follows:
var strSearchUrl = “https://en.search.wordpress.com/?src=organic&q=****&s=date&t=post”;
var strSearchResults = http.Request(strSearchUrl);
var strBlogRegex = @”span…a.href=.https://(?<Blog>\w+.wordpress.com)”;
where q is the search term,
Now, for example, to get all posts from a blog, call;
var strPostsEndpoint = “https://public-api.wordpress.com/rest/v1/sites/{0}/posts/”;
strPostsEndpoint = string.Format(strPostsEndpoint,strBlog);
var strPostsJson = http.Request(strPostsEndpoint);
var jPosts = JObject.Parse(strPostsJson);
and to like a post, I called
var strLikeEndpoint = “https://public-api.wordpress.com/rest/v1/sites/{0}/posts/{1}/likes/new”;
strLikeEndpoint = string.Format(strLikeEndpoint, strBlog, strPostId);
var strResponse = http.Request(strLikeEndpoint, “POST”, “”);
#Car #Registration #API in #Chile launched today

Chile, a nation of 17.91 Million people, and 4.26 million cars (Source: WHO), has now been added to our rapidly growing list of support for international vehicle APIs. With this API, you can determine the make, model, age, and even the owner’s name and RUT (Rol Único Tributario) number.
You can sign up to the API here; http://cl.matriculaapi.com/
Car registration plates in Chile use the /CheckChile endpoint and return the following information:
- Make & Model
- Age
- Owner information
- Representative image
Sample Registration Number:
DKCZ90
Sample Json:
{
“Description”: “BMW 116 M 1.6”,
“RegistrationYear”: “2012”,
“CarMake”: {
“CurrentTextValue”: “BMW”
},
“CarModel”: {
“CurrentTextValue”: “116 M 1.6”
},
“MakeDescription”: {
“CurrentTextValue”: “BMW”
},
“ModelDescription”: {
“CurrentTextValue”: “116 M 1.6”
},
“ImageUrl”: “http:\/\/cl.matriculaapi.com\/image.aspx\/@Qk1XIDExNiBNIDEuNg==”,
“DriverRut”: “18145092-4”,
“DriverName”: “LUIS EDUARDO SALINAS FARR\u00c1N”,
“ValidSince”: “2015-04-01”,
“Expiry”: “2016-03-31”,
“VehicleType”: “AUTOMOVIL”
}
#Car #Registration #API in #Argentina just launched

http://ar.matriculaapi.com/ is an API that allows developers determine the make, model, age and region from a Argentinian number plate. It is the latest country to be added to our growing global coverage, and the first south american country to be supported.
Argentina has a population of 43 million people, and a driving percentage of 31.5%, giving a total volume of 13.8 million vehicles registered in Argentina.
To try out the API, head over to the website, and create a free account, then call the web service using the /CheckArgentina endpoint to return the following information:
- Make & Model
- Age
- Region
- Representative image
Sample Registration Number:
NOD441
Sample Json:
{
“Description”: “FIAT PALIO ATTRACTIVE 1.4 5 P “,
“RegistrationYear”: “2014”,
“CarMake”: {
“CurrentTextValue”: “FIAT”
},
“CarModel”: {
“CurrentTextValue”: “PALIO ATTRACTIVE 1.4 5 P “
},
“MakeDescription”: {
“CurrentTextValue”: “FIAT”
},
“ModelDescription”: {
“CurrentTextValue”: “PALIO ATTRACTIVE 1.4 5 P “
},
“Region”: “Ciudad de Buenos Aires”,
“ImageUrl”: “http:\/\/ar.matriculaapi.com\/image.aspx\/@RklBVCBQQUxJTyBBVFRSQUNUSVZFIDEuNCA1IFAg”
}
госномер.com #API now includes #SovietUnion registration numbers

госномер.com is an API that returns data on Russian-registered cars, and is designed primarily for current Russian vehicles. However, thanks to a partnership with Avto-Nomer.ru, the API now includes Soviet Union registered vehicles, which are pre-1991.
The format of the data returned for a Soviet Union Registered car is much reduced, but the image returned is of the car itself, rather than being representative.
Here is a sample response;
{
“Description”:“Izh 412ИЭ-028”,
“CarMake”:{
“CurrentTextValue”:“Izh”
},
“CarModel”:{
“CurrentTextValue”:“412ИЭ-028”
},
“MakeDescription”:{
“CurrentTextValue”:“Izh”
},
“ModelDescription”:{
“CurrentTextValue”:“412ИЭ-028”
},
“ImageUrl”:“http://www.госномер.com/image.aspx/@SXpoIDQxMtCY0K0tMDI4”
}
#jQuery.ScrollTo broken in #Chrome 61

If you use the jQuery.scrollTo, or a plugin dependant on it, such as
/**
* SmoothScroll
* This helper script created by DWUser.com. Copyright 2013 DWUser.com.
* Dual-licensed under the GPL and MIT licenses.
* All individual scripts remain property of their copyrighters.
* Date: 10-Sep-2013
* Version: 1.0.1
*//**
* jQuery.ScrollTo – Easy element scrolling using jQuery.
* Copyright (c) 2007-2013 Ariel Flesler – aflesler(at)gmail(dot)com | http://flesler.blogspot.com
* Dual licensed under MIT and GPL.
* @author Ariel Flesler
* @version 1.4.3.1
*/
Then you may find on Chrome 61, the page refuses to scroll.
The solution, I found was to use these CSS classes for HTML and BODY
html {
    overflow: hidden;
    height: 100%;
}
body {
    height: 100%;
    overflow: auto;
}
#Popcorntime remote for #iOS @popcorntimetv @giacomocerquone

Getting off your sofa is far too much exercise some days, and if you have popcorn time running on the mac, and just slightly out of reach, you really need something to remotely control it.
I found an app on the Android app store to control it, but I didn’t find an equivalent on the IOS. So I decided to write my own.
Which you can download here:
https://itunes.apple.com/us/app/popcorn-remote/id1290119967?ls=1&mt=8&at=1000l9tW
So, first, pairing. The easiest way to do this is to go to Settings > Show Advanced Settings > Remote Control, Create Pairing QR code. this generates a code like this

To Save you running a QR scanner on that, it decodes to {“ip”:”192.168.1.249″,”port”:”8008″,”user”:”popcorn”,”pass”:”popcorn”} – obviously the IP is dependant on your network.
Then I downloaded a Javascript library by Giacomo Cerquone, called Butter_remote.js
And wrote a little HTML like this;
http://butter_remote.js
https://code.jquery.com/jquery-1.12.4.min.js$(init);
function init()
{
butter_remote.init(
{
username: “popcorn”,
password: “popcorn”,
ip: “127.0.0.1”,
port: “8008”,
debug: “false”
}
);
$(“#btnPlayPause”).bind(“click”,function playPause(){
butter_remote.toggleplaying();
});
$(“#btnForward”).bind(“click”,function playPause(){
butter_remote.right();
});
$(“#btnBack”).bind(“click”,function playPause(){
butter_remote.left();
});
}Play/Pause
Forward
Back
Then just to wrap that in a Cordova/Phonegap app, and install it on my phone 🙂
OLE DB provider “SQLNCLI10” for linked server returned message “No transaction is active.”

When you set up a linked server environment between two SQL servers, that are not on the same network, and you try to run a transaction that includes a reference to a linked server; by running a SQL statement like
BEGIN TRANSACTION
update LINKED_SERVER.MY_DATABASE.dbo.MY_TABLE set MY_COLUMN = 1
COMMIT TRANSACTION
and you get an error message like
OLE DB provider “SQLNCLI10” for linked server “myserver” returned message “No transaction is active.”.
Msg 7391, Level 16, State 2, Line 2
The operation could not be performed because OLE DB provider “SQLNCLI10” for linked server “myserver” was unable to begin a distributed transaction.
Then the solution turned out to be – after two days of head-scratching – to : put the Net BIOS name (computer name) for each server involved in the transaction into the hosts file at both sides of the transaction.
The hosts file is in c:\Windows\System32\Drivers\etc\hosts – and you’ll need administrator access to change it.
