Facebook Manual Login flow (JQuery / OAuth / FQL)
Although Facebook recommend that you use their SDK to provide access to their data, and only suggest using the manual login flow for Windows 8 apps, or desktop apps, lets just take a look at how you do it. – This particular code is designed for use within Phonegap mobile apps, where cross domain ajax is permitted.
As with all OAuth systems, you never get to see the user’s username and password, you are only provided with proof that the user has logged in.
So, the first step, is to send the user to the Facebook login page.
function openLoginDialog()
{
console.log(“openLoginDialog()”);
var strUrl = buildLoginDialog(OAUTH_App_id,OAUTH_Redirect_Url);
location.href=strUrl;
}function buildLoginDialog(app_id, redirect_uri)
{
console.log(“buildLoginDialog(” + app_id + “,” + redirect_uri + “)”);
var strUrl = “https://www.facebook.com/dialog/oauth?”;
strUrl += “client_id=” + app_id;
strUrl += “&redirect_uri=” + redirect_uri;
return strUrl;
}
When openLoginDialog is called, then the user will be redirected to the login page on facebook. You will need to have a App_id set up in Facebook developers. The redirect URL is any page online, as long as it’s authorised for your facebook app.
Once facebook returns the user to your URL, it will append a “code” in the querystring. You need to now exchange this code for an access_key, this is because the code is very easily spoofed, so it needs to be checked.
function ExchangeCodeForAccessToken(code,callback)
{
console.log(“ExchangeCodeForAccessToken(” + code + “)”);
/*
https://graph.facebook.com/oauth/access_token?
client_id={app-id}
&redirect_uri={redirect-uri}
&client_secret={app-secret}
&code={code-parameter}
*/
var strUrl = “https://graph.facebook.com/oauth/access_token?”;
strUrl += “client_id=” + OAUTH_App_id;
strUrl += “&redirect_uri=” + OAUTH_Redirect_Url;
strUrl += “&client_secret=” + OAUTH_App_Secret;
strUrl += “&code=” + code;
$.get(strUrl,function(data)
{
console.log(data);
OAUTH_Access_token = getQueryVariable(“access_token”,data);
var expiry = getQueryVariable(“expires”,data);
var currentDate = new Date();
OAUTH_Expiry = new Date(currentDate.getTime() + expiry*1000);
localStorage.setItem(“OAUTH_Access_token”,OAUTH_Access_token);
localStorage.setItem(“OAUTH_Expiry”,OAUTH_Expiry);
callback();
});
}
This ideally should be placed on a server, since the App_secret is now visible to anyone who decompiles your code.
Once you have the access_token, then you can make authenticated requests against Facebook, one of the most flexible ways to query facebook’s data is using FQL, which is based on SQL, as it’s name suggests.
Here is some code I used to run a FQL query against facebook, and display the results using mustache
function logged_in()
{
console.log(“logged_in()”);
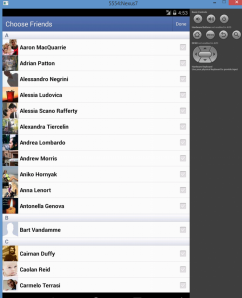
executeFql(“SELECT name, uid FROM user WHERE uid in (SELECT uid2 FROM friend WHERE uid1 = me())”,function(data)
{
fqlResponse = data;
console.log(JSON.stringify(data));
var template = $(“#friendlistTpl”).html();
var html = Mustache.to_html(template, {data: data});
$(“#friendlist”).html(html);
});
}function executeFql(query,callback)
{
console.log(“executeFql(” + query + “)”);
var strUrl = “https://api.facebook.com/method/fql.query?”;
strUrl += “query=” + encodeURI(query);
strUrl += “&access_token=” + OAUTH_Access_token;
strUrl += “&format=json”;
$.get(strUrl,callback);
}
I hope all that info helps someone!
com.facebook.http.protocol.ApiException: Key hash does not match any stored key hashes.
 I’m not alone in the type of developer who things he understands how something works without reading instructions, and this is certainly a lesson in reading instructions before banging you head off a wall trying to fix a problem that was solved by reading the next paragraph.
But, the diagnostic technique may help someone else.
I was trying to get the Android Facebook SDK to get up and running, with a view to then move onto the Phonegap Facebook Plugin. But quite naturally, I knew that I would have to get the base level Facebook SDK examples to work before moving on to the Phonegap plugin.
So, I installed the Facebook Android SDK, imported the projects into my workspace, and tried to run the first one, Friend Picker, and lo and behold. Nothing. Nada. No worky. Just a prompt asking me permission, then nothing else.
I tried then connecting a real android device. Same result. #
I checked in LogCat, and scrolled up to the first mention of a Facebook related error and got this:
04-08 04:50:01.757: W/fb4a(:<default>):BlueServiceQueue(1711): com.facebook.http.protocol.ApiException: Key hash bBZxOcCkWDdGSW8zex5GXuvuwpY does not match any stored key hashes.
04-08 04:50:01.757: W/fb4a(:<default>):BlueServiceQueue(1711): at com.facebook.http.protocol.ApiResponseChecker.b(ApiResponseChecker.java:83)
04-08 04:50:01.757: W/fb4a(:<default>):BlueServiceQueue(1711): at com.facebook.http.protocol.ApiResponseChecker.a(ApiResponseChecker.java:162)
04-08 04:50:01.757: W/fb4a(:<default>):BlueServiceQueue(1711): at com.facebook.http.protocol.ApiResponse.g(ApiResponse.java:151)
04-08 04:50:01.757: W/fb4a(:<default>):BlueServiceQueue(1711): at com.facebook.platform.auth.server.AuthorizeAppMethod.a(AuthorizeAppMethod.java:275)
04-08 04:50:01.757: W/fb4a(:<default>):BlueServiceQueue(1711): at com.facebook.platform.auth.server.AuthorizeAppMethod.a(AuthorizeAppMethod.java:31)
04-08 04:50:01.757: W/fb4a(:<default>):BlueServiceQueue(1711): at com.facebook.http.protocol.ApiResponseHandler.a(ApiResponseHandler.java:55)
04-08 04:50:01.757: W/fb4a(:<default>):BlueServiceQueue(1711): at com.facebook.http.protocol.ApiResponseHandler.handleResponse(ApiResponseHandler.java:28)
04-08 04:50:01.757: W/fb4a(:<default>):BlueServiceQueue(1711): at com.facebook.http.common.FbHttpRequestProcessor.a(FbHttpRequestProcessor.java:314)
04-08 04:50:01.757: W/fb4a(:<default>):BlueServiceQueue(1711): at com.facebook.http.common.FbHttpRequestProcessor.a(FbHttpRequestProcessor.java:144)
04-08 04:50:01.757: W/fb4a(:<default>):BlueServiceQueue(1711): at com.facebook.http.common.FbHttpRequestProcessor.b(FbHttpRequestProcessor.java:100)
04-08 04:50:01.757: W/fb4a(:<default>):BlueServiceQueue(1711): at com.facebook.http.common.FbHttpRequestProcessor.a(FbHttpRequestProcessor.java:230)
04-08 04:50:01.757: W/fb4a(:<default>):BlueServiceQueue(1711): at com.facebook.http.protocol.SingleMethodRunnerImpl.a(SingleMethodRunnerImpl.java:402)
04-08 04:50:01.757: W/fb4a(:<default>):BlueServiceQueue(1711): at com.facebook.http.protocol.SingleMethodRunnerImpl.a(SingleMethodRunnerImpl.java:164)
04-08 04:50:01.757: W/fb4a(:<default>):BlueServiceQueue(1711): at com.facebook.http.protocol.AbstractSingleMethodRunner.a(AbstractSingleMethodRunner.java:18)
04-08 04:50:01.757: W/fb4a(:<default>):BlueServiceQueue(1711): at com.facebook.platform.common.server.SimplePlatformOperation.a(SimplePlatformOperation.java:40)
04-08 04:50:01.757: W/fb4a(:<default>):BlueServiceQueue(1711): at com.facebook.platform.common.server.PlatformOperationHandler.a(PlatformOperationHandler.java:60)
04-08 04:50:01.757: W/fb4a(:<default>):BlueServiceQueue(1711): at com.facebook.fbservice.service.BlueServiceQueue.e(BlueServiceQueue.java:329)
04-08 04:50:01.757: W/fb4a(:<default>):BlueServiceQueue(1711): at com.facebook.fbservice.service.BlueServiceQueue.d(BlueServiceQueue.java:55)
04-08 04:50:01.757: W/fb4a(:<default>):BlueServiceQueue(1711): at com.facebook.fbservice.service.BlueServiceQueue$3.run(BlueServiceQueue.java:258)
04-08 04:50:01.757: W/fb4a(:<default>):BlueServiceQueue(1711): at java.util.concurrent.Executors$RunnableAdapter.call(Executors.java:422)
04-08 04:50:01.757: W/fb4a(:<default>):BlueServiceQueue(1711): at java.util.concurrent.FutureTask.run(FutureTask.java:237)
04-08 04:50:01.757: W/fb4a(:<default>):BlueServiceQueue(1711): at com.facebook.common.executors.ListenableScheduledFutureImpl.run(ListenableScheduledFutureImpl.java:59)
04-08 04:50:01.757: W/fb4a(:<default>):BlueServiceQueue(1711): at android.os.Handler.handleCallback(Handler.java:733)
04-08 04:50:01.757: W/fb4a(:<default>):BlueServiceQueue(1711): at android.os.Handler.dispatchMessage(Handler.java:95)
04-08 04:50:01.757: W/fb4a(:<default>):BlueServiceQueue(1711): at android.os.Looper.loop(Looper.java:136)
04-08 04:50:01.757: W/fb4a(:<default>):BlueServiceQueue(1711): at android.os.HandlerThread.run(HandlerThread.java:61)
04-08 04:50:01.797: D/dalvikvm(2292): GC_FOR_ALLOC freed 467K, 15% free 3196K/3736K, paused 360ms, total 366ms
04-08 04:50:01.997: W/CursorWrapperInner(2292): Cursor finalized without prior close()
04-08 04:50:02.107: I/Choreographer(382): Skipped 31 frames! The application may be doing too much work on its main thread.
04-08 04:50:02.137: W/fb4a(:<default>):GDPDialog(1711): Failed to send
04-08 04:50:02.137: W/fb4a(:<default>):GDPDialog(1711): com.facebook.fbservice.service.ServiceException: API_ERROR: API_ERROR
04-08 04:50:02.137: W/fb4a(:<default>):GDPDialog(1711): at com.facebook.fbservice.ops.BlueServiceOperation.c(BlueServiceOperation.java:639)
04-08 04:50:02.137: W/fb4a(:<default>):GDPDialog(1711): at com.facebook.fbservice.ops.BlueServiceOperation.c(BlueServiceOperation.java:47)
04-08 04:50:02.137: W/fb4a(:<default>):GDPDialog(1711): at com.facebook.fbservice.ops.BlueServiceOperation$2.run(BlueServiceOperation.java:604)
04-08 04:50:02.137: W/fb4a(:<default>):GDPDialog(1711): at android.os.Handler.handleCallback(Handler.java:733)
04-08 04:50:02.137: W/fb4a(:<default>):GDPDialog(1711): at android.os.Handler.dispatchMessage(Handler.java:95)
04-08 04:50:02.137: W/fb4a(:<default>):GDPDialog(1711): at android.os.Looper.loop(Looper.java:136)
04-08 04:50:02.137: W/fb4a(:<default>):GDPDialog(1711): at android.app.ActivityThread.main(ActivityThread.java:5017)
04-08 04:50:02.137: W/fb4a(:<default>):GDPDialog(1711): at java.lang.reflect.Method.invokeNative(Native Method)
04-08 04:50:02.137: W/fb4a(:<default>):GDPDialog(1711): at java.lang.reflect.Method.invoke(Method.java:515)
04-08 04:50:02.137: W/fb4a(:<default>):GDPDialog(1711): at com.android.internal.os.ZygoteInit$MethodAndArgsCaller.run(ZygoteInit.java:779)
04-08 04:50:02.137: W/fb4a(:<default>):GDPDialog(1711): at com.android.internal.os.ZygoteInit.main(ZygoteInit.java:595)
04-08 04:50:02.137: W/fb4a(:<default>):GDPDialog(1711): at dalvik.system.NativeStart.main(Native Method)
Finding the first reference (highlighted in bold) was
com.facebook.http.protocol.ApiException: Key hash does not match any stored key hashes.
So, I searched for that online, and realised I hadn’t read all the instructions, you have to enter in the hash provided (base64 padded) to https://developers.facebook.com/settings/developer/sample-app/
– Which is generated from DOS, like this:
C:\OpenSSL-Win32\bin>keytool -exportcert -alias androiddebugkey -keystore %HOMEP
ATH%\.android\debug.keystore | openssl sha1 -binary | openssl base64
Enter keystore password: android
bBZxOcCkWDdGSW8zex5GXuvuwpY=
Obviously, this means that I’ll have to re-do this step whenever I’m using my signing key. Hopefully that’s not going to be a problem…
Confirm18.com – Credit card verification, without taking payment
- A user visits your website – say, http://www.yourwebsite.com/welcome.html
- The user clicks on a link saying “I am over 18” on your website, and it takes the user to the page http://www.confirm18.com/verify.aspx?merchant=xxx
- If the user passes our credit-card check, then they will be returned to your website, say http://www.yourwebsite.com/page1.html
To set this up, you must have at least three webpages on your website.
- A welcome page, where you ask the user to click a link saying “I am 18”
- A success page, where the user will be taken if they pass our credit-card check
- A failure page, where the user will be taken if they fail our credit-card check
When you register on this website, you will set up your success and failure urls, and you will be given a merchant id. This is then used in the link from your welcome page to our website, in the form http://www.confirm18.com/verify.aspx?merchant=xxx where xxx is your merchant id.
More advanced uses: Passing a consumer idIf you need to make sure that the user that you send to our verification process is the same user that comes back in to your success page, then you should use the consumerid parameter to ensure that you do not loose track of a user’s session, shopping cart, or preferences.
To pass a consumerid, simply add it as a parameter to the link to our verification page, i.e. http://www.confirm18.com/verify.aspx?merchant=xx&consumer=yy where xx is your merchant id, and yy can be any value that identifies the user on your website.
The consumer id will be passed back in the querystring to either the success or failure page. i.e. http://www.yourwebsite.com/success.html?consumer=yy
Additionally, if the user fails the credit check, then the reason will be passed back in the querystring to the failure page on your website. You can choose whether to display the reason for failure to the user or not.
i.e. http://www.yourwebsite.com/fail.html?consumer=yy&reason=Bank_Invalid
Reasons can be as followsCard_type_invalid = The card issuing network does not match that suppled by the user Bank_Invalid = The bank entered by the user did not match that of the card issuing bank IP_Invalid = The card is issued by a bank in another country than the user’s current location
You can optionally opt to allow certain failures, for example, IP_Invalid could happen under legitimate circumstances, if the user is abroad on holiday.
Premium Only: Branding the verification pageBy default, our verification page will show our adverts, and our branding. If you wish to remove these, you can upgrade to a premium account.
Once you have upgraded to a premium account, then you can embed the verification page as an iFrame in your website, so the user will not be aware that they are using Confirm18.com
To use this verification iframe, use code such as the following
Where “xxx” is your merchant id.
Your success and failure urls may need to use iFrame killer script to ensure the correct user experience, i.e.
<script type=”text/javascript”> if (top != self) top.location.replace(location); </script>
Premium Only: API useageIf you want to have full control over the branding of the Confirm18.com experience, then premium users can avail of our API. This API is designed for developers, and requires programming experience. It is based on industry standard XML SOAP.
You can find the API at the following URL: http://www.confirm18.com/api.asmx, where you will find two methods:
Method 1:
VerifyCreditCard(int merchantid, string consumerId, string firstSixDigits, string clientIP, string cardType, string bankName)
– Performs the same check as Verify.aspx, returns a class containing pass/fail , and a reason, and the data returned from both the BIN lookup and IP lookup
* The merchant must have a premium account
Method 2:
VerifyPastCheck(string consumerid, int merchantid)
– Used to get information on a past verification check, either to double check that the user has arrived on the success url via legitimate means, or to get extra information about your customers.
* The merchant must have a premium account
Nokia X Try & Buy Pilot
![]()
Unveiled at the MWC in Barcelona was the Nokia X, the first Nokia phone to run Android.
Keen to get started, I submitted an app on the day, to the Nokia Publish site, although, it wasn’t until afterwards that I realised I never set a price point for the app. Believe it or not, There is no simple pay-to-download option for Nokia X apps. – Gasp –
So, after research, I see that Nokia are piloting a Try & Buy scheme using in-app payments. Here is the technical details I’ve found about it:
Nokia Try&Buy Pilot – Developer Guide
- Select your apps for T&B
- Create the app metadata in Publish, if new app.
- Create the Product ID (and related metadata) in Publish
- Remember to include: Display name, short and long description and Global Price Point (recommended 3 to 5)
- Choose the type of trial
- Time based (180 seconds) or usage based (3 plays)
- You can change the duration of the trial, 180 seconds is the default setting.
- Fill the T&B configurations in the table below with the following information: Content ID, Product ID, Display Name, Price Point, Trial Type (time vs plays) and Trial Duration
- Send your APKs and T&B configurations to the partner manager
- Use the cloud storage information provided to you by your partner manager
- Package your files in a single zip file with a meaningful name (eg PacMan_T&B.zip)
- Upload your package in the storage provided
- Nokia T&B team will wrap your APKs and upload a new package in the same folder
- Sign your APKs and upload to Publish
- If premium, convert your app to free (App must be published as free)
- Change the content file name (not the display name) to end with _TRYBUYNOK (Eg. PacMan becomes PacMan_TRYBUYNOK)
- Add the following sentence to the Content Description: This content has a time-based free trial which provides the user with free access to the content for a limited time period.
- Modify your application icon in order to include the wording “Free trial”. Example
- Make sure to sign each APK with your signature, upload them Publish and submit your app.
- Notify your PM once these steps have been completed
| Title | Title 1 | Title 2 | Title 3 | Title 4 |
| Content ID | ||||
| Product ID | ||||
| Display Name | ||||
| Price Point | ||||
| Trial Type | ||||
| Trial Duration |
Find duplicate name values in resx files
 A Resx file is used to define localized text in a .NET application. It is an XML file, which is primarily in the form:
var datanodes = document.getElementsByTagName(“data”);var strNames = [];for(i=0;i<datanodes.length;i++){strNames.push(datanodes[i].getAttribute(“name”));};strNames = strNames.sort();var results = []; for (var i = 0; i < strNames.length – 1; i++) { if (strNames[i + 1] == strNames[i]) { results.push(strNames[i]); }}; console.log(results);
It will then list any duplicate name vales.
Broadcast data to all viewers of your webpage using Firebase

Firebase is a cloud-hosted JSON based database, which can be used to replace the back-end of web applications.
It excells in certain cases, using websockets to communicate seamlessless between client and server, it removes the need for postbacks or Ajax polling.
Here is a simple example using Firebase to broadcast a message to all viewers of a particular web-page. I have removed the security settings for this particular instance, so no username or password is required.
The callback is event-orientated, so whenever the value held in the database changes, the event is fired on all clients, with the snapshot object containing the updated value.
<html>
 <head>
  <script type='text/javascript' src='https://cdn.firebase.com/js/client/1.0.6/firebase.js'></script>
  <script src="http://code.jquery.com/jquery-1.11.0.min.js"></script>
  <script language="javascript">
    var myRootRef = new Firebase('https://vivid-fire-7206.firebaseio.com/');
    function setData()
	{
		myRootRef.set($("#message").val());
	}
	myRootRef.on('value', function(snapshot) {
	  $("#lastMessage").html(snapshot.val());
	});
  </script>
  Say something to all users viewing this page:<br>
  <input name="text" id="message" onkeyup="setData()">
   <br>
   <br>
   <h2 id="lastMessage"></h2>
 </head>
 <body>
 </body>
</html>
Flu Trends App
Flu Trends App
Tracking flu epidemics in real-time
Overview:
People report their daily lives through social media, and it’s only natural when someone has a cold or flu, they mention this on social media sites, such as Twitter. – Sample tweets like the one below indicate, not only when people are ill, but where they are also.

This project seeks to trawl social media sites in a systematic manor looking for tweets relating to “flu”, “cough”, “sneeze”, “ill” etc., and using sentiment analysis on the messages to ensure that the message is genuinely referring to an ailment, and not taken out of context.
The objective of the project is to present this data as an App, that people can use to see if flu epidemics are developing in their area, or at their child’s school.
Innovation:
Projects such as Google Flu trends (http://www.google.org/flutrends/) have existed for some time, and they draw on data from public health institutions to provide a global picture of Flu patterns over time. This is certainly useful, but fails to provide a real-time, up to the minute picture of Flu outbreaks in the local area of the user.
Social media is an excellent source of real-time information, and feeding this into a mobile App, provides excellent coverage of those who mention they are ill via Twitter, or other similar social media sites.
Implementation:
A server-side application will constantly gather data on tweets sent using certain key phrases relating to flu, this will then analyse the tweet data for context, and then store them in a database, along with any geo-tagging information associated with the tweet.
An app, which will be made available for iOS and Android, – based on the PhoneGap framework, which will appear, similar to the prototype below, will display data that is relevant to the user, by using the user’s current physical location
Extra historical data will be taken in from other sources, such as Google Flu Trends, to allow users see past flu trends in their area.
Commercial applications:
Although the app will be designed primarily for the general health benefit of its users, and will be offered free. The data collected will be available for sale to other organisations via an API (Application programming Interface), chargeable per request, and advertised via ProgrammableWeb and Mashape.
It is expected that healthcare institutions may be interested in using this data in order to better allocate resources, and spot emerging epidemics before they become a serious public health threat.
Install free SSL certificate on IIS (startssl, not self-signed)
Create (or reauthenticate) your account
go to https://www.startssl.com/ and authenticate (or sign-up or use the express lane button).
This process involves entering a authentication code send to your e-mail address.
Follow the procedure, everything is pretty straightforward. Don’t forget to backup your certificate which is installed in your browser. If you reinstall your pc, you will need this certificate to gain access to your account.
Do e-mail validations first
The first catch. If you want to create a certificate for another domain.
First do a “email address validation” in the validations wizard for the domain you will be creating a certificate for. If you want to create a certificate for domainxyz.com, then first do an email validation for postmaster, hostmaster or webmaster@domainxyz.com. For the .com TLD you might have other possibilities also.
If you did not validated this e-mail address, you won’t receive any verification codes on this e-mail address.
Create a certificate
If you follow all instructions on the “certificates wizard”. If you let startssl generate your private key, you should have a at least the following files at hand
ssl.key (the encrypted private key)
ssl.crt (the certificate or public key)
The SSL.crt could be used on a windows server, but that would be only the public key. For HTTPS you also need the private key, because you need to decrypt the encrypted data. So you will need to link the private key and the certificate together as we will describe in the next steps.
Decrypt private key
First go to the toolbox and click the “decrypt private key”.
Paste in the content of the ssl.key file, enter your password which you provided in the previous step.
You now have a DECRYPTED private key. Copy this decrypted key.
Create Certificate for IIS
Now go to “Create PKCS#12” in the toolbox. Paste the decrypted key in the first box (private key). And paste the content of the ssl.crt file in the second box. Provide a new password to protect the file you will be creating.
Click continue.
Now download the PFX and use this file to install the certificate on your IIS 7.0/7.5 or higher.
Install the certificate
Open Inetmgr (Internet Information Services – IIS Manager) and open the “server certificates” on server level.
Click the “IMPORT” button and supply the PFX you just created (and uploaded?). You might not have the right file extension, but that is no problem. Just choose *.* as file type, select the file. Finish off with your password, before hitting return.
Redefine bindings of website
If you have only one HTTPS site running Go to your HTTPS site,
click “Bindings”
“Edit” the https (port 443) line
choose the right SSL certificate
hit “OK”,
and click the “Close” button
Bindings when hosting multiple sites
If you have multiple sites running on your website, you might want to set the binding headers for HTTPS. This can be done using the command prompt (as administrator) using these two commands:
C:\Windows\system32>cd \windows\system32\inetsrv
C:\Windows\System32\inetsrv>appcmd set site /site.name:”” /+bindings.[protocol=’https’,bindingInformation=’:443:’]
change the “”, “”, “” to approprate value’s.
Email a Crash report from a BlackBerry App

Too often, I get a email from a user who downloaded an app saying, “my app crashed, help”, and it’s very hard to diagnose the problem if you can’t re-create the problem on your own device. So, I thought of adding a crash report screen to my BlackBerry Webworks app.
Since I use “Console.log” statements all over my apps when developing the app, then the diagnostic information is already there.
All I needed to do is declare a global variable, and then replace all my console.log’s with log(string), and then have log(string) add to this global variable. Have this visible in a <pre> tag within a page to display a crash report, like shown opposite.
The clever bit, is then to have this send an email:
function email(to, subject, body) {
var message = to + ‘?subject=’ + subject + ‘&body=’ + body;
blackberry.invoke.invoke({
target: ‘sys.pim.uib.email.hybridcomposer’,
action: ‘bb.action.OPEN, bb.action.SENDMAIL’,
type: ‘message/rfc822’,
uri: ‘mailto:’ + message
});
}Which is taken from the BuiltForBlackBerry Bootstrap on Github.
Switching language on Windows 8 Store App (WinJS)

Using the Multilingual App Toolkit for Visual Studio is a great way to quickly make your app available across many different languages, and make it much more attractive to foreign users.
But, you do get tempted, as I did, to click every box, and upload every language from Arabic to Zimbabwean, but then, my app got rejected because my screenshots were in English.
Sure you can go into control panel, switch your language, and restart the app, in the simulator, but for 20-30 languages, it takes aaaages… So I came up with a bit of javascript that switches the app language every 3 seconds, so that you get time to take a screenshot of each language.
var iLangPointer = 0;
function CycleLanguages() {
var supportedLangs = [“ar”, “cs-CZ”, “da-DK”, “de”, “el-GR”, “es”, “et-EE”, “fi-FI”, “fr”, “hu-HU”,
“it”, “ja-JP”, “ko-KR”, “lt-LT”, “lv-LV”, “nb-NO”, “nl”, “pl-PL”, “pt”,
“ru-RU”, “sv”, “zh-Hans”];
Windows.Globalization.ApplicationLanguages.primaryLanguageOverride = supportedLangs[iLangPointer];
WinJS.Resources.processAll();
WinJS.Resources.processAll();
iLangPointer++;
if (iLangPointer >= supportedLangs.length) iLangPointer = 0;
}
Then, this is called from WinJS.UI.Pages.define {ready: … with
setInterval(CycleLanguages, 3000);
And it saves hours of work!
The App is a free download (for now), you can download it here:
http://apps.microsoft.com/windows/en-gb/app/wine-search/65894548-5b19-47a6-b262-641540e5bb5f
